Vue类的创建 在开始我们要创建一个Vue类来模拟Vue整体的框架
1
2
3
export default class Vue { constructor ( }
在入口文件中将Vue类导入,并设置为全局属性
1
2
3
import Vue from "./Vue" ;window .Vue = Vue
在html中实例化一个Vue类,并模拟Vue的挂载方式
1 2 3 4 5 6 7 8 9 10 11 12 13 <body > <div id ="app" > </div > <script > new Vue ({ el : '#app' , data : { a : 10 } }) </script > </body >
当Vue类被实例化之后,Vue内部就会进行数据响应式处理和模板编译。
1
2
3
4
5
6
7
8
9
10
11
12
13
14
15
import Compile from "./Compile" export default class Vue { constructor (options ) { this .$options = options || {} this ._data = options.data || undefined new Compile (options.el , this ) } }
数据响应式部分 在这里我们需要导入之前已经完成的数据响应式模块的代码,
1
2
3
4
5
6
7
8
9
10
11
12
13
14
15
16
17
18
19
20
21
22
23
24
25
26
27
28
29
30
import Compile from "./Compile" import { observe } from "./数据响应式/observe" export default class Vue { constructor (options ) { this .$options = options || {} this ._data = options.data || undefined observe (this ._data ) this ._initData () new Compile (options.el , this ) } _initData ( var self = this Object .keys (this ._data ).forEach (key => Object .defineProperty (self, key, { get ( return self._data [key] }, set (newVal ) { self._data [key] = newVal } }) }) } }
模板编译部分 我们来研究模板编译部分
我们主要通过一个Compile类来进行模板编译,它要求传入挂载的容器以及整个Vue实例
1
2
3
4
5
6
7
8
9
10
11
12
13
14
15
16
17
18
export default class Compile { constructor (el, vue ) { this .$vue = vue this .$el = document .querySelector (el) if (this .$el ) { this .node2Fragment (this .$el ) } } node2Fragment (el ) {} }
node2Fragment函数
我们使用node2Fragment函数来代替AST,作为一个AST的轻量级。
在这里我们会用到一个JS方法document.createDocumentFragment()
createDocumentFragment()方法创建了一虚拟的节点对象,节点对象包含所有属性和方法。
我们在这里需要用到的就是:当向createDocumentFragment创建的虚拟节点对象插入dom树中的某一节点,那么这个节点就会从原来的dom树中删除
1
2
3
4
5
6
7
8
9
10
11
node2Fragment (el ) { var child var fragment = document .createDocumentFragment () while (child = el.firstChild ) { fragment.appendChild (child) } return fragment }
通过node2Fragment函数得到fragment虚拟节点对象,然后传给compile函数进行编译
compile函数
在compile函数中会对传入的挂载容器的虚拟节点对象中的节点进行判断
当完成compile函数进行的模板编译之后,要将解析好的虚拟节点再重新上树
1
2
3
4
5
6
7
8
9
10
11
12
13
14
15
16
17
18
19
20
21
22
23
24
25
26
27
28
29
30
31
32
33
34
35
36
37
38
39
40
41
42
43
44
45
46
47
48
export default class Compile { constructor (el, vue ) { this .$vue = vue this .$el = document .querySelector (el) if (this .$el ) { this .$fragment = this .node2Fragment (this .$el ) this .compile (this .$fragment ) this .$el .appendChild (this .$fragment ) } } node2Fragment (el ) { } compile (fragment ) { const childNodes = fragment.childNodes var self = this childNodes.forEach (node => if (node.nodeType == 1 ) { self.compileElement (node) } else if (node.nodeType == 3 ){ let text = node.textContent self.compileText (text) } }) } compileElement (node ) {} compileText (text ) {} }
compileElement函数 compileElement函数
compileElement函数内部会去看看有没有vue中的一些指令(例如:v-if,v-model等),如果有的话,就解析指令并进行相应操作
1
2
3
4
5
6
7
8
9
10
11
12
13
14
15
16
17
18
19
20
21
22
23
24
25
compileElement (node ) { let nodeAttrs = node.attributes Array .prototype slice .call (nodeAttrs).forEach (attr => let attrName = attr.name let attrValue = attr.value if (attrName.indexOf ('v-' ) == 0 ) { let dir = attrName.substring (2 ) if (dir == 'if' ) { } else if (dir == 'model' ) { } } }) }
在html中我们用如下代码进行测试:
1 2 3 4 5 6 7 <div id ="app" > <h3 class ="aaa" v-if ="if" > {{a}}</h3 > <ul > <li > A</li > <li > B</li > </ul > </div >
attr中的内容:
dir的内容:
分析指令操作 我们以v-model为例来分析Vue中指令的操作
1 2 3 4 <div id ="app" > {{b.m.n}} <input type ="text" v-model ="b.m.n" > </div >
先解决双向绑定的第一层,即input输入框能显示得到数据
1
2
3
4
5
6
7
8
9
10
11
12
13
14
15
16
17
18
19
20
21
22
23
24
25
26
27
28
29
30
31
32
33
34
35
36
compileElement (node ) { let nodeAttrs = node.attributes var self = this Array .prototype slice .call (nodeAttrs).forEach (attr => console .log ('attr:' ,attr); let attrName = attr.name let attrValue = attr.value if (attrName.indexOf ('v-' ) == 0 ) { let dir = attrName.substring (2 ) if (dir == 'model' ) { let v = self.getVueVal (self.$vue , attrValue) node.value = v } } }) } getVueVal (vue, exp ) { var val = vue exp = exp.split ('.' ) exp.forEach (k => val = val[k] }) return val }
这就实现了在输入框中显示v-model绑定的数据
双向绑定的第二层,input输入框中改变数据,页面渲染的数据也相应改变
1
2
3
4
5
6
7
8
9
10
11
12
13
14
15
16
17
18
19
20
21
22
23
24
25
26
27
28
29
30
31
32
33
34
compileElement (node ) { let nodeAttrs = node.attributes var self = this Array .prototype slice .call (nodeAttrs).forEach (attr => let attrName = attr.name let attrValue = attr.value if (attrName.indexOf ('v-' ) == 0 ) { let dir = attrName.substring (2 ) if (dir == 'model' ) { let v = self.getVueVal (self.$vue , attrValue) node.value = v new Watcher (self.$vue , attrValue, val => node.value = val }) node.addEventListener ('input' , e => var newVal = e.target .value self.setVueVal (self.$vue , attrValue, newVal) }) } } }) }
compileText函数 如果是一个文本节点,那么就需要看看文本中有没有双大括号语法,如果有的话,要将双大括号内的东西解析成具体数据
1
2
3
4
5
6
7
8
9
10
11
12
13
14
15
compileText (node, name ) { node.textContent = this .getVueVal (this .$vue , name) } getVueVal (vue, exp ) { var val = vue exp = exp.split ('.' ) exp.forEach (k => val = val[k] }) return val }
我们使用下面的例子来检测函数功能:
1 2 3 4 5 6 7 8 9 10 11 12 13 14 15 16 17 18 19 20 <div id ="app" > {{b.m.n}} <ul > <li > A</li > <li > B</li > </ul > </div > <script > let vm = new Vue ({ el : '#app' , data : { a : 10 , b : { m : { n : 100 } } } }) </script >
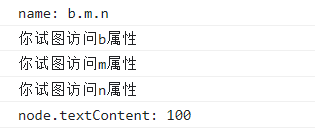
我们来看看传入compileText函数的双大括号内的属性(name),以及解析好之后的具体属性值
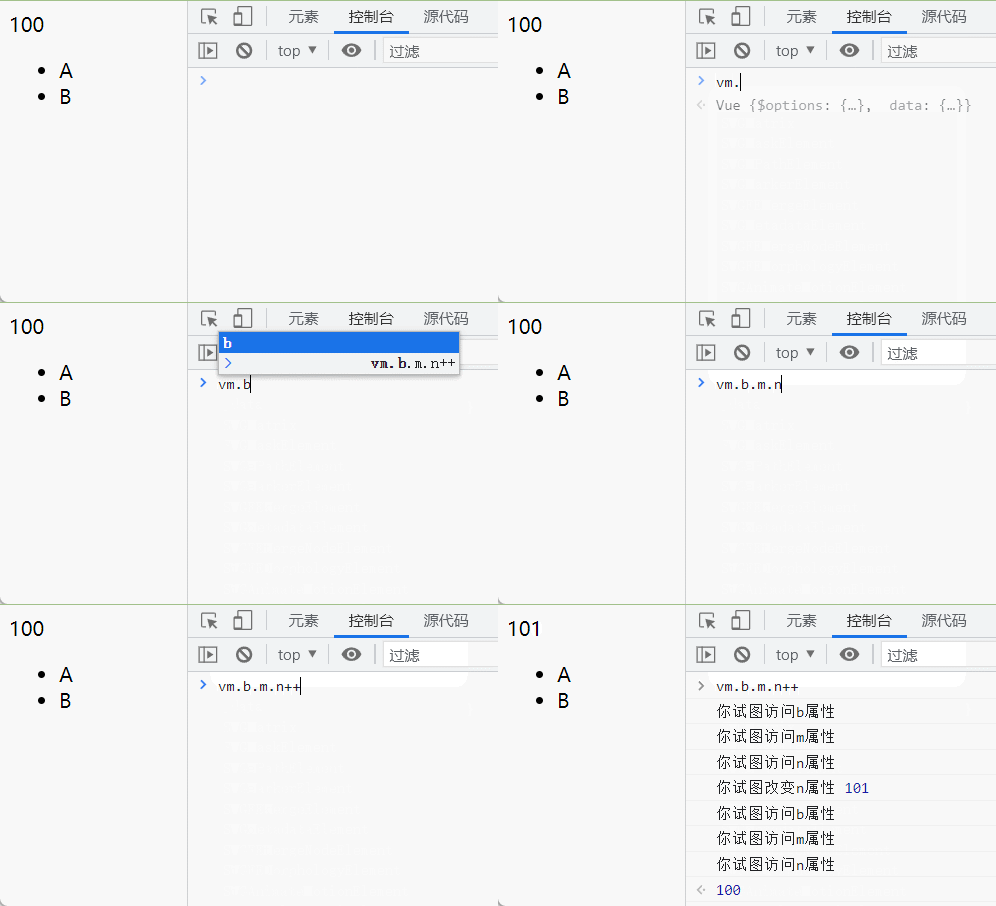
上树之后的页面:
虽然完成了双大括号的编译,也渲染到了页面上。但是当数据发生了改变时页面不会跟着改变。
1
2
3
4
5
6
7
8
9
compileText (node, name ) { node.textContent = this .getVueVal (this .$vue , name) new Watcher (this .$vue , name, val => node.textContent = val }) }
得到的结果:
最后 实例化Vue类
1 2 3 4 5 6 7 8 9 10 11 12 13 14 15 16 17 18 19 20 <body > <div id ="app" > {{b.m.n}} <input type ="text" v-model ="b.m.n" > </div > <script src ="/xuni/bundle.js" > </script > <script > let vm = new Vue ({ el : '#app' , data : { a : 10 , b : { m : { n : 100 } } } }) </script > </body >
Vue类
1
2
3
4
5
6
7
8
9
10
11
12
13
14
15
16
17
18
19
20
21
22
23
24
25
26
27
28
29
30
31
32
import Compile from "./Compile" import { observe } from "./数据响应式/observe" import Watcher from "./数据响应式/Watcher" export default class Vue { constructor (options ) { this .$options = options || {} this ._data = options.data || undefined observe (this ._data ) this ._initData () new Compile (options.el , this ) } _initData ( var self = this Object .keys (this ._data ).forEach (key => Object .defineProperty (self, key, { get ( return self._data [key] }, set (newVal ) { self._data [key] = newVal } }) }) } }
Compile类
Compile类主要用来处理模板编译的问题
1
2
3
4
5
6
7
8
9
10
11
12
13
14
15
16
17
18
19
20
21
22
23
24
25
26
27
28
29
30
31
32
33
34
35
36
37
38
39
40
41
42
43
44
45
46
47
48
49
50
51
52
53
54
55
56
57
58
59
60
61
62
63
64
65
66
67
68
69
70
71
72
73
74
75
76
77
78
79
80
81
82
83
84
85
86
87
88
89
90
91
92
93
94
95
96
97
98
99
100
101
102
103
104
105
106
107
108
109
110
111
112
113
114
115
116
117
118
119
120
121
122
123
import Watcher from "./数据响应式/Watcher" export default class Compile { constructor (el, vue ) { this .$vue = vue this .$el = document .querySelector (el) if (this .$el ) { this .$fragment = this .node2Fragment (this .$el ) this .compile (this .$fragment ) this .$el .appendChild (this .$fragment ) } } node2Fragment (el ) { var child var fragment = document .createDocumentFragment () while (child = el.firstChild ) { fragment.appendChild (child) } return fragment } compile (fragment ) { console .log (fragment); const childNodes = fragment.childNodes var self = this var reg = /\{\{(.+)\}\}/ childNodes.forEach (node => console .log ('node:' ,node) if (node.nodeType == 1 ) { self.compileElement (node) } else if (node.nodeType == 3 ){ let text = node.textContent if (reg.test (text)) { console .log ('匹配成功' ); let name = text.match (reg)[1 ] self.compileText (node, name) } } }) } compileElement (node ) { let nodeAttrs = node.attributes var self = this Array .prototype slice .call (nodeAttrs).forEach (attr => let attrName = attr.name let attrValue = attr.value if (attrName.indexOf ('v-' ) == 0 ) { let dir = attrName.substring (2 ) if (dir == 'model' ) { let v = self.getVueVal (self.$vue , attrValue) node.value = v new Watcher (self.$vue , attrValue, val => node.value = val }) node.addEventListener ('input' , e => var newVal = e.target .value self.setVueVal (self.$vue , attrValue, newVal) }) } } }) } compileText (node, name ) { node.textContent = this .getVueVal (this .$vue , name) new Watcher (this .$vue , name, val => node.textContent = val }) } getVueVal (vue, exp ) { var val = vue exp = exp.split ('.' ) exp.forEach (k => val = val[k] }) return val } setVueVal (vue, exp, value ) { var val = vue exp = exp.split ('.' ) exp.forEach ((k, i ) => { if (i != exp.length - 1 ) { val = val[k] } else { val[k] = value } }) } }


